In this guide we will go over the setup and configuration on Microsoft 365 Phone System. Microsoft describes Phone system with the below statement.
Phone System gives you PBX capabilities, but without the complicated and expensive equipment. Phone System allows you to replace your existing on-premises PBX system with a set of features delivered from Microsoft 365 or Office 365 that is tightly integrated into your cloud experience
Overview
- Pre-requisites
- Call flow examples
- Getting started with Trial licenses
- Prepare M365 Phone System
- Add user numbers
- Add Service numbers
- Add resource accounts
- Configure an auto-attendant
- Configure a nested auto-attendant
- Configure extensions for users
- Standardize the outbound calling line identity
- Toll Free numbers
Pre-Requisites
Some pre-requisites need to be met before you can configure Phone System.
- Make sure Phone System is available in your country (https://docs.microsoft.com/en-us/microsoftteams/country-and-region-availability-for-audio-conferencing-and-calling-plans/country-and-region-availability-for-audio-conferencing-and-calling-plans)
- Buy, or get a trial for M365 Phone System. In my case I will be using a trail version Microsoft 365 Business Voice.
Call Flow Examples
The Teams call flow to Microsoft Phone System Looks like the following.
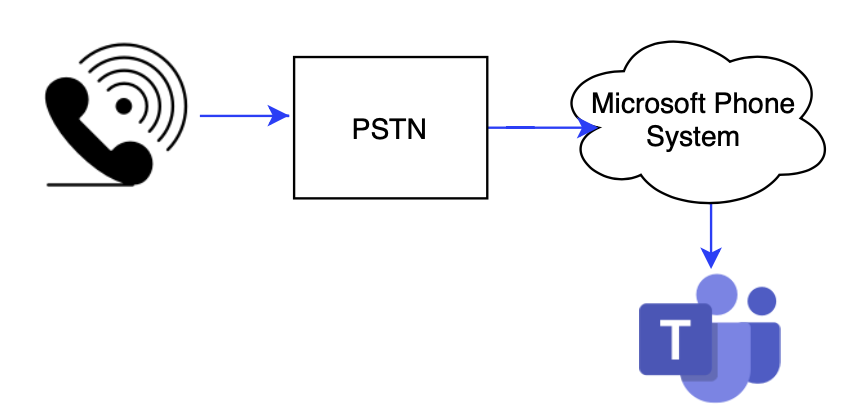
By the end of this article, you should be able to configure this call flow.
License Trial
As mentioned, above you need a compatible license for Microsoft 365 Phone System. I will use Microsoft 365 Business Voice. You can get the trial by going to the M365 Admin Center>Billing >Purchase Services and search for the license.
Prepare M365 Phone System
- When you have the purchased the license or taken a trial, assign it to a user.
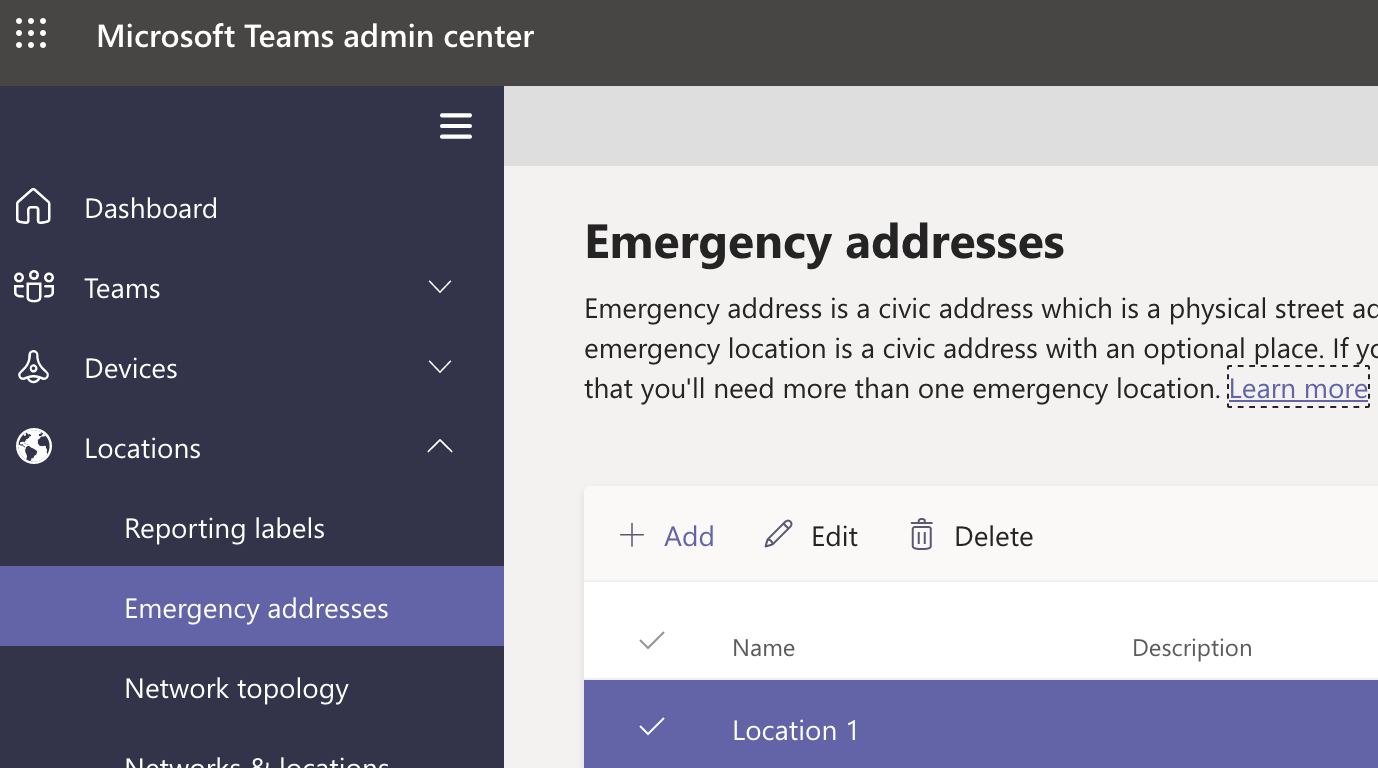
- Set Emergency locations. Emergency location must be associated with a phone number for emergency calls. You can do this from the Teams Admin Center>Locations>Emergency Addresses>Add.
Add & Assign a User Number
Before you can set up users in your organization to make and receive phone calls, you must get phone numbers for them.
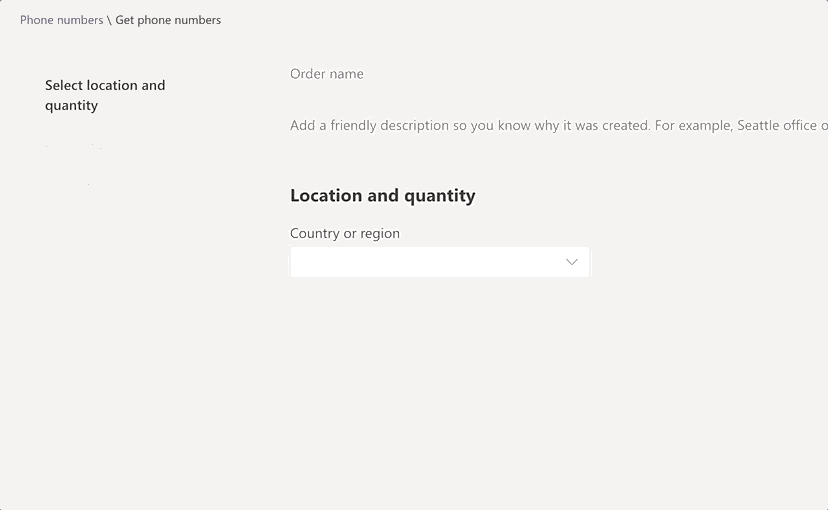
- Go to Teams Admin Center>Voice>Phone Numbers>Add
- Select User (Subscriber)
- Fill out the details for the number
- Select Place order and complete the process.
- To assign the number go to Voice>Phone Numbers and click edit. Assign a user and emergency location where required. Click save.
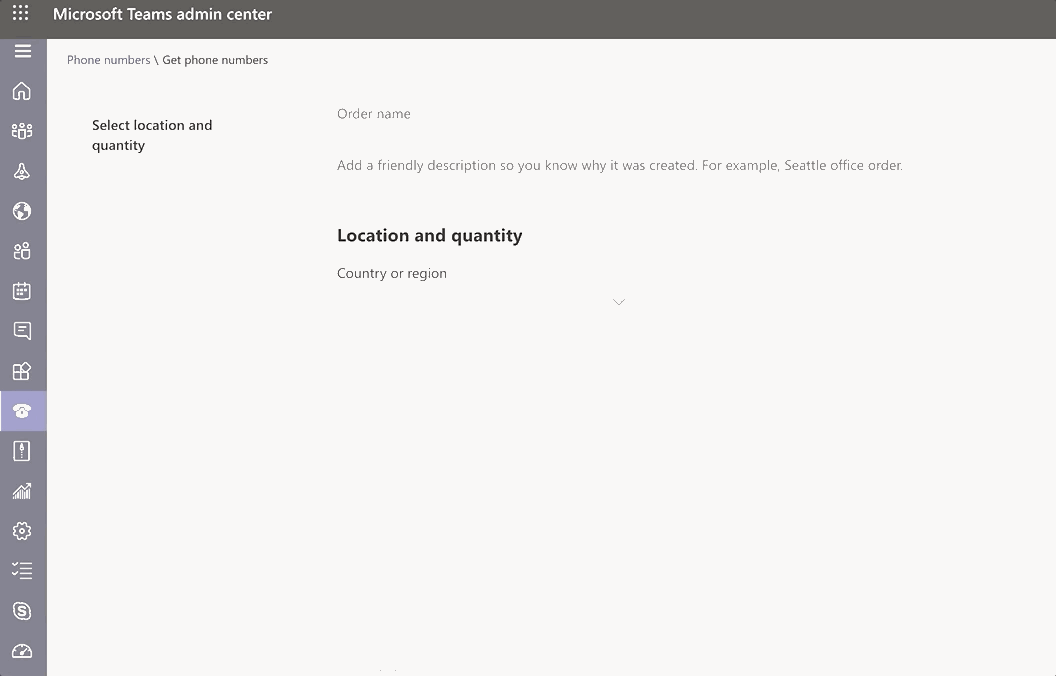
Add a Service Number
Service numbers can facilitate things like Audio Conferencing (for conference bridges), auto attendants, and call queues. Service numbers can be Toll or Toll-Free. If you want Toll-Free, you will need credits. See the end of this article. Steps are similar to those listed for a user number.
In this example, we will be adding a service number to facilitate an auto-attendant.
- Go to Teams Admin Center>Voice>Phone Numbers>Add
- Select Auto Attendant (Toll) – Or your relevant service
- Fill out the details for the number
- Place the order and complete the process
Add a Resource Account & Assign a Number
A resource account is also known as a disabled user object in Azure AD, and can be used to represent resources in general. In Microsoft Teams each Phone System call queue or auto attendant is required to have at least one associated resource account. Service accounts need a virtual user license.
- Go to Teams Admin Center>Org wide Settings>Resource Accounts>Add
- Fill out the resource account details. In my case, it will be an auto attendant. Note: I used the .onmicrosoft.com domain for this account.
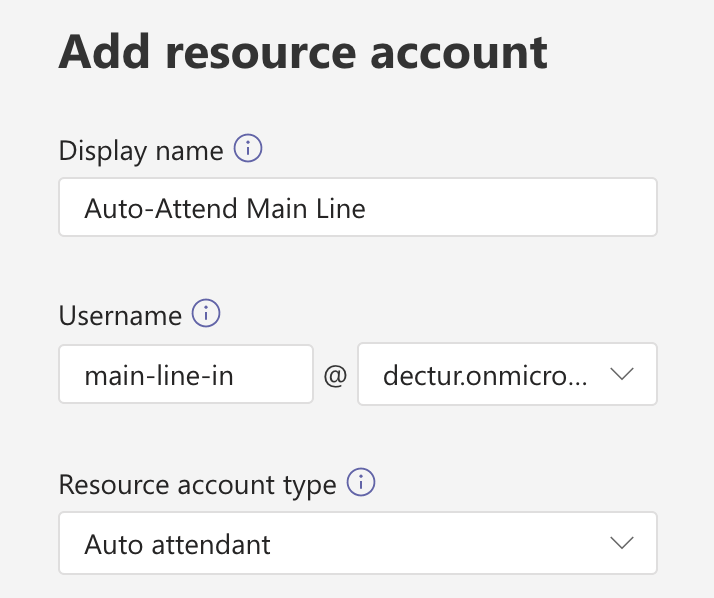
- Click Save
Note. It can take a few minutes to provision the account and may be a few minutes before you can assign a number. - Go to M365 Admin Center Users>Active Users and locate the service account. Assign a Microsoft 365 Phone System – Virtual User license. This is a free account and is required as the resource account needs a phone number.
- Go back to the Teams Admin Center>Org Wide Settings>Resource Accounts
- Select your account and click Assign/Unassigned
- Select an Online number
- Enter the server number you wish to use
Note: Do not use the international dial code (+ / plus). Use the Country code and area code. E.g. your service number is +1 289 xxx, you will want to enter 1289xxx so it shows as an option. - Click save
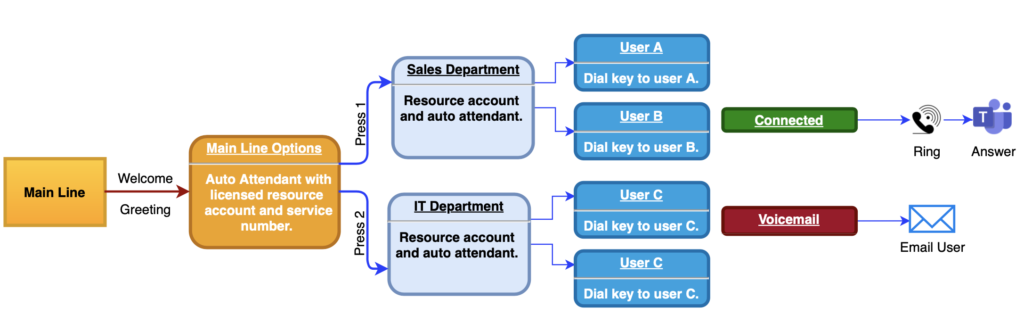
Configure an Auto Attendant
Auto attendants let people call your organization and navigate a menu system to speak to the right department, call queue, person, or an operator. In this example, the auto attendant will have two options for departments and one for directly to a user.
- Go to Teams Admin Center>Voice>Voice Attendants>Add
- On the General Info page set a name, Time Zone and language for your auto attendant. You can optionally set an operator. In my case, we will not use this.
- Fill out details in the call flow page. You have the option to upload pre-recorded greetings and menu options. In my case, I will use text based greetings. I will set 1 to redirect to a user, and 2 to go to that users voicemail.
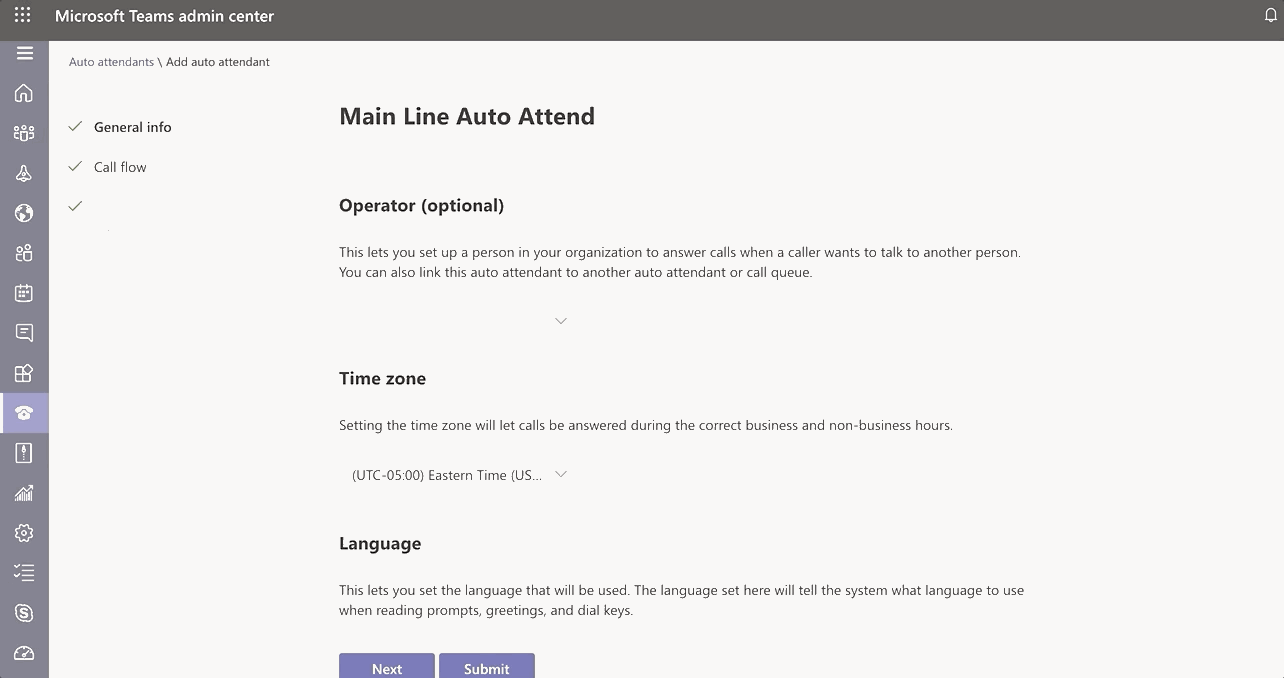
- Set the business hours and any greetings you wish to be played outside of business hours
- Set any holidays hours and greetings
- Set the dial scope
- Add the Resource Account previously created.
Reminder: This account must have the virtual user license. Don’t forget to assign a number to that account. - Submit
Configure a Nested Auto Attendant
A nested auto attendant is used as a second-level menu that the first-level auto attendant connects as call to. A nested auto attendant isn’t required to have a phone number assigned to its resource account.
An example of the flow will be Press 1 for Sales, Press 2 for IT. Caller presses 1. Press 1 for John, Press 2 for Dec.
- Add a Resource account as shown above. Do not add a number. This account also doesn’t need a license.
- Create an auto attendant as shown above, setting the account to the new Resource Account.
Note: This will be the nested auto attend. - Modify your top level auto attendant, adding a dial key pointing to your second level auto attendant. During the dial key configuration, click Voice App and enter the second level resource account.

- Save your First Level auto attendant.
- Test calling your main line (First Level auto attendant) and select the dial key which will point you to your second level auto attendant.
Configure Extensions for Users
Dial By Extension needs to have an extension specified as part of one of the following phone attributes defined in Active Directory or Azure Active Directory:
- HomePhone
- Mobile/MobilePhone
- TelephoneNumber/PhoneNumber
- OtherTelephone
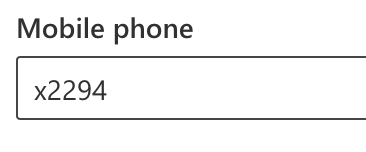
In order to assign an extension to a user, you have to use the M365 Admin center of PowerShell (Set-MSOLUser). The required format to enter the extension in the user phone number field is either +<phonenumber>;ext=<extension> or x<extension>. It can take up to 12 hours before the extension attributes propagate and are available.
In my example, I have used the format x<extension> and placed it in the Mobile Phone field.
This took some time before it worked. Go ahead and test the extension by dialing your main line, enter the extension following by #.
Standardize Outbound Identity
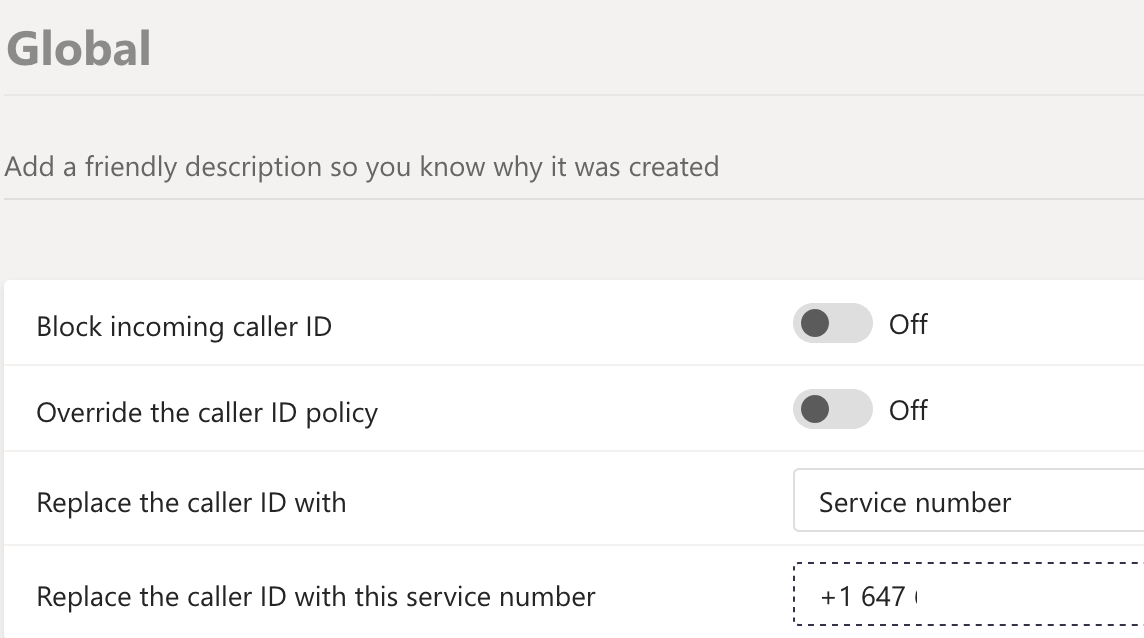
Caller ID policies are used to change or block the Caller ID (also called a Calling Line ID) for users. By default, the user’s phone number is displayed when a call is made to a PSTN phone number such as a landline or mobile phone. You can use the Global (Org-wide default) policy and customize it or create a custom policy that provides an alternate number to display, or to block any number from being displayed.
In my case, I will edit the caller ID to be that of the main lin / first level auto attendant.
- Go to Teams Admin Center>Voice>Caller ID Policies
- Either add or modify the Global Policy
- Change the field for Replace the caller ID with. In my case I will be using a service number.
- For Replace the caller ID with this service number select your number from the drop down.
- Save and test outgoing call.
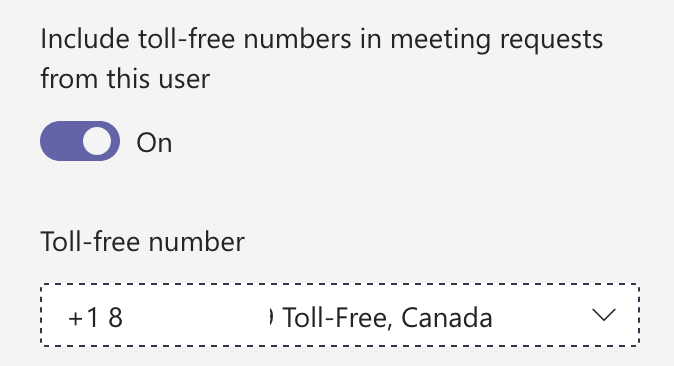
Toll Free Numbers
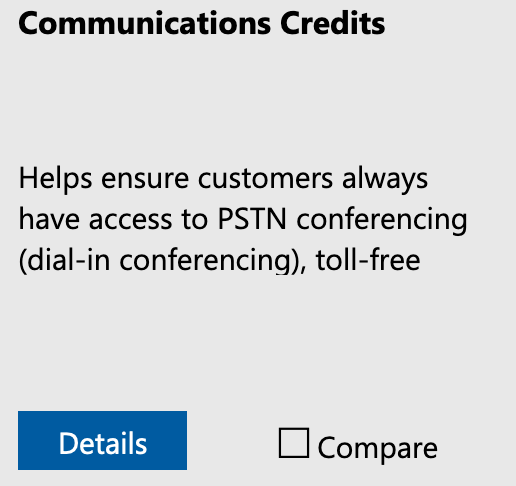
In order to get a toll free number, you first need to purchase Communications Credits. Communications Credits are a convenient way to pay for Audio Conferencing and Calling Plan minutes. Once purchased, you can get a Toll free number and use it for Audio Conferencing meetings, auto attendants, or call queues. Usage will be billed to your credits.
To buy communication credits
- Go to the Microsoft 365 Admin Center>Billing>Purchase Services
- Search for Communications credit and click try the add-on category
- Location Communications credits
- Complete the purchase order.
Once purchased, you can now get Toll Free numbers. To get a Toll Free Number
- Go to the Teams Admin Center>Voice>Phone Numbers
- Click Add and fill out the details. In my example, we will be getting a Toll free conference bridge.
- Complete the order of the new number.
- Assign the toll free number to users / auto attendants etc. at the user or account level. E.g. a user will be assigned from Teams Admin Center>Users>user>Account>Audio Conferencing>Edit